Tag Archives: Pool Construction

Video Of Inground Equipment Pad With Hayward Cartridge Filter!

This short video shows an equipment pad for a inground vinyl liner pool. The filter is a Hayward C-900 cartridge filter. Water is moved by a 1hp Hayward superpump. A Heatpro heatpump from Hayward along with an Aqua-Rite salt system round out the setup.

We started installing cartridge filters a couple of years ago. For years we put DE filters on inground setups but wanted to get away from dealing with DE powder. A cartridge filter runs only a little less in the microns it will filter down too, but without the powder to deal with. And it still filters a lot more effeciently than a sand filter.

Enjoy this short video showing the cartridge filter setup.

Vermiculite Base For Vinyl Liner Inground Pool!!

This is a short video showing the process when troweling the bottom in on a vinyl liner inground pool. You can see how we start with nothing but dirt and gravel, and trowel the base material over that untill the bottom is finished.

We use a vermiculite base rather than a grout base. Vermiculite sets up hard enough to walk on, but stays soft enough to be able to do any repairs needed. We can scrape any trowel marks, or repair any rough patches to get the bottom as close to perfect as possible. With grout (concrete) base you can not do this. Unless if a grinder is used any trowel marks or imperfections are permanent.

Vermiculite also allows water to flow through it back and forth. This allows for it to not crack like a grout mix will.

You can see the string lines we set in the bottom. This lets us trowel the bottom in exact so that our liners fit like they are supposed to. If you do not set string lines you are guessing at the dimensions, and there is a good chance your liner will not fit perfect.

24′ Above Ground Pool Liner Change!

In this video you can watch the process for changing the liner in an above ground pool. We changed this liner in the early spring. It was raining every day at that point. You will notice the standing water in the yard because of it.

When there is alot of rain in the spring it will cause pool installations to be tough to do. It’s a little hard to build pools in mud. Service work like liner changes can still be done even if it is a little wet.

Enjoy the video!

Above Ground Pool Liners. What Are The Differences?

There really can’t be that much difference in above ground pool liners, right? Well you are right. The main difference in them is the way that they hang on the pool wall. Other than that they are pretty much the same. There are differences in pattern styles you can choose from but you are talking cosmetics now and not function.

There are three different ways that above ground pool liners are made to hang on the wall.

Overlap Liners!

This will be the most popular, and well known style of liner. These liners simply hang over the top of the wall. You use a plastic coping strip that pushes down over the wall and liner to hold it in place. This type of liner is the most economical way to go as far as cost goes. One complaint about this type is that you can see it on the outside of the pool wall. Yes you can and that is why I personally don’t care for them.

Beaded Liners!

Beaded liners are an option that is fairly well known. Most pool companies will sell beaded liners as an upgrade with a pool kit. These liners come with border patterns around the top, and usually a print pattern on the sides and bottom. When a beaded liner is installed you use a bead receiver. This is a track that snaps on top of the wall. It has a channel in it that the bead at the top of the liner snaps into. The downfall to this is, as your liner ages and shrinks over time it will have a tendency to pull out of the track. It then slips down the inside of the pool and can be a problem. A big thing we hear with beaded liners is, you don’t have to take the top of the pool apart to change them. We have done hundreds of liner changes on above ground pools, and we take the top off to change a beaded liner. Most times you do not have enough room under the topseats to get the new liner snapped into the track without a struggle. Easier to just take the top of the pool apart.

J-Bead or J-Hook Liners

This style liner came on the market around 12 years ago. You have the same thing as a beaded liner except for how it hooks to the wall. Instead of using a bead receiver track, there is an upside down J on the top of the liner that hooks on the wall. The advantage to this over the beaded liner is you have no issues with the liner slipping out of the bead receiver. This style liner is what we install on 90 percent of above ground pools.

There you have the three different options for liners on above ground pools.

Steps And Benches For Vinyl Liner Inground Pools!

One of the trends that is happening in the vinyl liner pool market is the option of covering steps and benches with the liner. I personally think that it is a great way to go. It gives the pool a uniform look rather than having a white fiberglass step sticking out against a blue liner.

Fiberglass steps and seating areas.

Going this route is the least expensive and the easy way to build a vinyl pool. The step or bench comes as a one piece unit that is bolted into place with the wall panels. The liner is sealed around these with a gasket and faceplate strip. This makes it easy to build the pool, knowing that your liner will fit without wrinkles. The bulk of vinyl pools are built this way and turn out very nice.

Vinyl covered steps and benches.

Going this route when building a vinyl pool is becoming very popular as I stated before. Adding the steps and benches with the liner covering them gives the pool complete uniformity. The color scheme of the liner is the same across the whole pool without the steps sticking out.

One of the drawbacks to covering the step was the use of rod pockets and clips to hold the liner into the step. It could be a pain to work with this system of securing the liner to the step or bench area. Manufactures now make a bead receiver that is built into the step or bench when it is assembled. The liner manufacture welds a bead on the backside of the liner where it will attach to the step. This is the same bead that is used to secure the liner into the coping around the top of the pool. This works much better in securing the liner to the step or bench than the rod pocket and clip system.

Building a pool with a vinyl covered step does require the builder to really pay attention to dimensions and measurements when constructing the pool. If the pool is not built right to specs there is a chance the liner will have wrinkles around the step area. You would think that should not be an issue but a lot of pools are built with the philosophy, “ah that’s close enough”. Sad to say but it’s true.

Overall if you are looking to put some “wow” factor into your vinyl liner pool, look at the vinyl covered step and bench options.

Why The Bottom Of Your Vinyl Liner Inground Needs String Lines!

What do you mean I need string lines in the bottom of my pool? When I am talking about string lines, I do not mean when the pool is finished. When the liner is installed you do not want anything underneath it but the material used for the bottom of your pool. And you want it to be completely clean.

So what do I mean by string lines in the bottom of the pool? During the construction of your pool, when the bottom is being done is when your contractor should be using string lines. Whatever style or shape the bottom of your pool will be, the use of string lines insures that the dimensions and measurements are right.
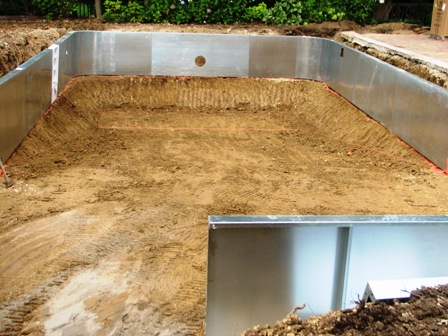
Correct Depth!

This is the biggest reason why I feel that setting string lines are important. Once the wall panels for your pool are set in place and leveled, your contractor should measure from the top of the wall down into the hole to get the exact depth. We will set rebar pins and tie off string line so we know right where we are supposed to be. Whether your pool is going to have a finished depth of 8’, 6’ or whatever you decide on, the way to make sure it is exact is to set string lines.

Liner Fit!

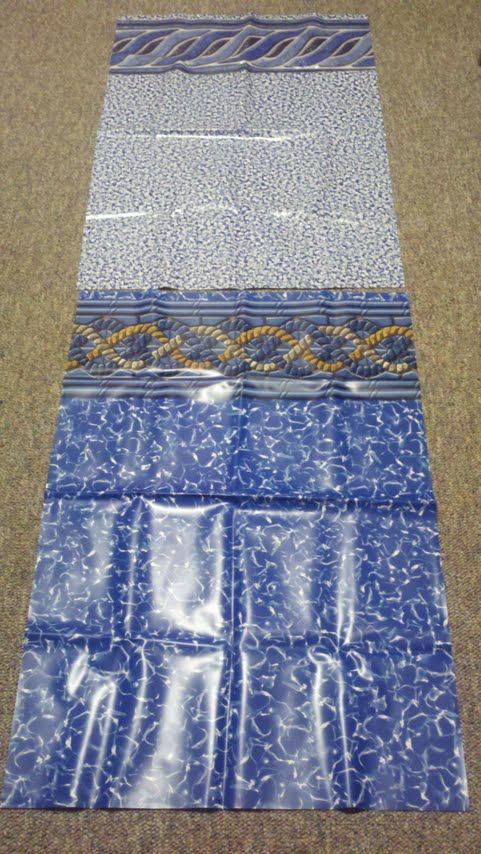
The liner will be made to fit your pool. Your contractor will have a dig sheet showing the dimensions of the liner for your pool. They now have to build the pool to fit the liner. Do not let your pool builder tell you they can stretch the liner in place. Liners will stretch but it should never be more than 1”, two at the most. If the liner is stretched into place it will cause it to be pulled to thin in spots, which shortens the life of the liner. No matter how well the dig is done, unless string lines are set, there is no reference point to go off of when the pool base material is installed. Setting reference points with string lines can cause extra work. There will probably be places than need to be cleaned out, either by shovel or possibly a pick. Possibly there needs to be gravel added to the bottom to fill in low spots. Most pool builders I have seen will not take the time to do this. They place the bottom material by putting just enough to cover the dirt and say “we’ll let the liner stretch in place”, not caring to make sure the dimensions for the bottom are right. Not good.
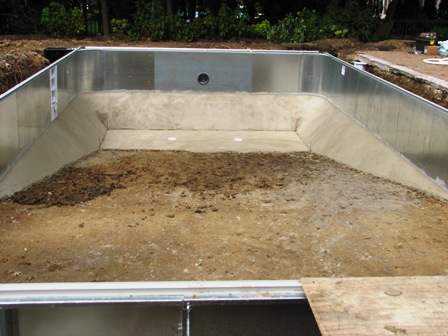
Pool Base Material!

Whatever your pool builder uses for the base of your pool, whether it is a vermiculite mix or a grout concrete mix, it needs to be installed at a certain thickness. This is where settings string lines allows for the builder to see if there is enough room between the dirt and the string to install the base material at the proper thickness.

If you want the liner for your pool to fit like it was made too, it is a good idea to make sure your contractor sets string lines as reference points. Don’t get me wrong. You can “eyeball” it close. When you are spending thousands of dollars on your pool project though, do you want it close, or exact?

Happy swimming!!